Building a Flow does not automatically make calls enter it. The persona that owns the number must use Custom Flow as its incoming-call route.
Before You Connect It
Confirm that:
- The Flow has been reviewed from beginning to end.
- Every Menu key matches the spoken prompt.
- Transfer and voicemail actions have failure paths.
- Business-hours and after-hours paths were tested.
- The Flow does not contain placeholder recipients or an Admin PIN from a shared template.
Select the Flow
- Open the persona menu in the upper-left corner of the Phound desktop app.
- Select the gear to manage personas.
- Select the persona that owns the incoming number.
- Open Additional settings, then Incoming calls.
- Select Custom Flow.
- Choose the intended Flow and confirm its name appears under Custom Flow.
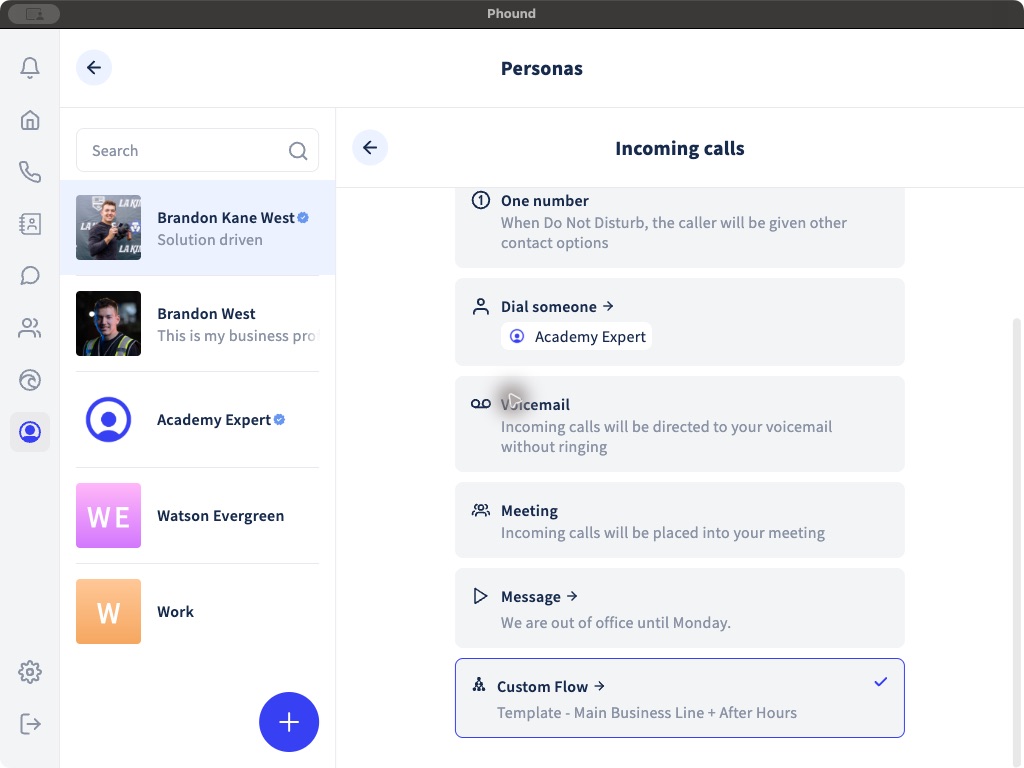
Only one incoming-call route is active at a time. Selecting Custom Flow replaces the persona's previous route, such as Ring in Phound, Voicemail, Meeting, or Message.
Verify the Connection
Call the persona's number from a separate phone. Confirm the first Flow prompt plays and complete at least one full route.
If the call does not enter the Flow:
- Reopen Incoming calls and confirm the checkmark is on Custom Flow.
- Confirm the Flow name under the selection.
- Confirm you edited the persona that owns the number you called.
- Check the Flow's first action and any Condition that can change the opening route.
- Review Test and Troubleshoot a Flow.
For every other incoming-call choice, see Incoming Call Routing.